Add Workflows Steps
After having created your new workflow type, you can begin adding steps to the workflow.
Start from Previous Solution
If you wish to use the previous solution as a starting point:
git clone https://github.com/Aquaveo/tethysapp-workflows_tutorial.git
cd tethysapp-workflows_tutorial
git checkout -b add-workflows-files-step add-workflows-files-step-complete
Add Input Steps
In order to add and test some workflow steps, you'll need to add a few new files.
Start by creating a new file called attributes.py to your basic_workflow folder with the following contents:
    import param


    class PointAttributes(param.Parameterized):
        point_name = param.String(
            label="Name",
            doc="Name of point that will be used to reference it in results.",
            allow_None=False,  #: Required
        )
Next, create a new file called step_params.py with this code:
import logging

import param

log = logging.getLogger(f'tethys.{__name__}')


class DatasetsParam(param.Parameterized):
    """
    Param form that defines the form in the Routing Options step
    """
    def __init__(self, *args, **kwargs):
        # Pop these to avoid warning messages.
        self._request = kwargs.pop('request', None)
        self._session = kwargs.pop('session', None)
        self._resource = kwargs.pop('resource', None)
        super().__init__(*args, **kwargs)
        self.set_data_options()

    def set_data_options(self):
        options = [
            'Increasing Data', 'Decreasing Data', 'Random Data'
        ]
        default = []
        self.param.add_parameter(
            'datasets',
            param.ListSelector(
                label='Datasets for Plotting',
                doc='Select one dataset to plot in your final results.',
                default=default,
                objects=options,
                allow_None=False
            )
        )
Next, you'll need to add a few imports
Begin by adding this code to the beginning step of of your innermost __init__.py file:
    from ..workflow_base import WorkflowBase

    from tethysext.workflows.steps import SpatialInputStep, SpatialDatasetStep, TableInputStep, FormInputStep, SetStatusStep
    from .attributes import PointAttributes
    import pandas as pd
Next, add this code to your BasicWorkflow class:
    class BasicWorkflow(WorkflowBase):
        ...

        boundary_step = SpatialInputStep(
            name='Boundary Input Step',
            order=10,
            help="Use the Point tool to define a boundary.",
            options={
                'shapes': ['polygons', 'extents'],
                'singular_name': 'Example Boundary',
                'plural_name': 'Example Boundaries',
                'allow_shapefile': True,
                'allow_drawing': True
            },
            geoserver_name=geoserver_name,
            map_manager=map_manager,
            spatial_manager=spatial_manager,
        )

        workflow.steps.append(boundary_step)

        point_step = SpatialInputStep(
            name='Point In Boundary Step',
            order=20,
            help="Use the Point tool to define a location or locations in the boundary.",
            options={
                'shapes': ['points'],
                'singular_name': 'Location',
                'plural_name': 'Locations',
                'allow_shapefile': True,
                'allow_drawing': True,
                'attributes': PointAttributes()
            },
            geoserver_name=geoserver_name,
            map_manager=map_manager,
            spatial_manager=spatial_manager,
        )
        workflow.steps.append(point_step)


        spatial_dataset_step = SpatialDatasetStep(
            name='Spatial Dataset Step',
            order=30,
            help='This step will be used to select a spatial dataset.',
            options={
                 'geometry_source': {
                    SpatialDatasetStep.OPT_PARENT_STEP: {
                        'match_attr': 'name',
                        'match_value': point_step.name,
                        'parent_field': 'geometry'
                    }
                },
                'dataset_title': 'Transformations to Perform',
                'template_dataset': pd.DataFrame(columns=['X','Y']),
                'plot_columns': ('X', 'Y'),
            },
            geoserver_name=geoserver_name,
            map_manager=map_manager,
            spatial_manager=spatial_manager,
        )

        spatial_dataset_step.parents.append(point_step)
        workflow.steps.append(spatial_dataset_step)

        table_input_step = TableInputStep(
            name='Table Input Step',
            order=40,
            help="Enter the following parameters for each dataset.",
            options={
                'dataset_title': 'Table Input',
                'read_only_columns': ['Soil Texture'],
            }
        )
        workflow.steps.append(table_input_step)

        dataset_input_step = FormInputStep(
            name='Dataset Input Step',
            order=50,
            help="Select a dataset here",
            options={'param_class': 'tethysapp.workflows_tutorial.workflows.basic_workflow.step_params.DatasetsParam'},
        )
        workflow.steps.append(dataset_input_step)

        set_status_step = SetStatusStep(
            name='Set Status',
            order=60,
            help='Set the status of the workflow to ready to run.',
            options={'status': 'ready'},
        )
        workflow.steps.append(set_status_step)

        return workflow
Try It Out
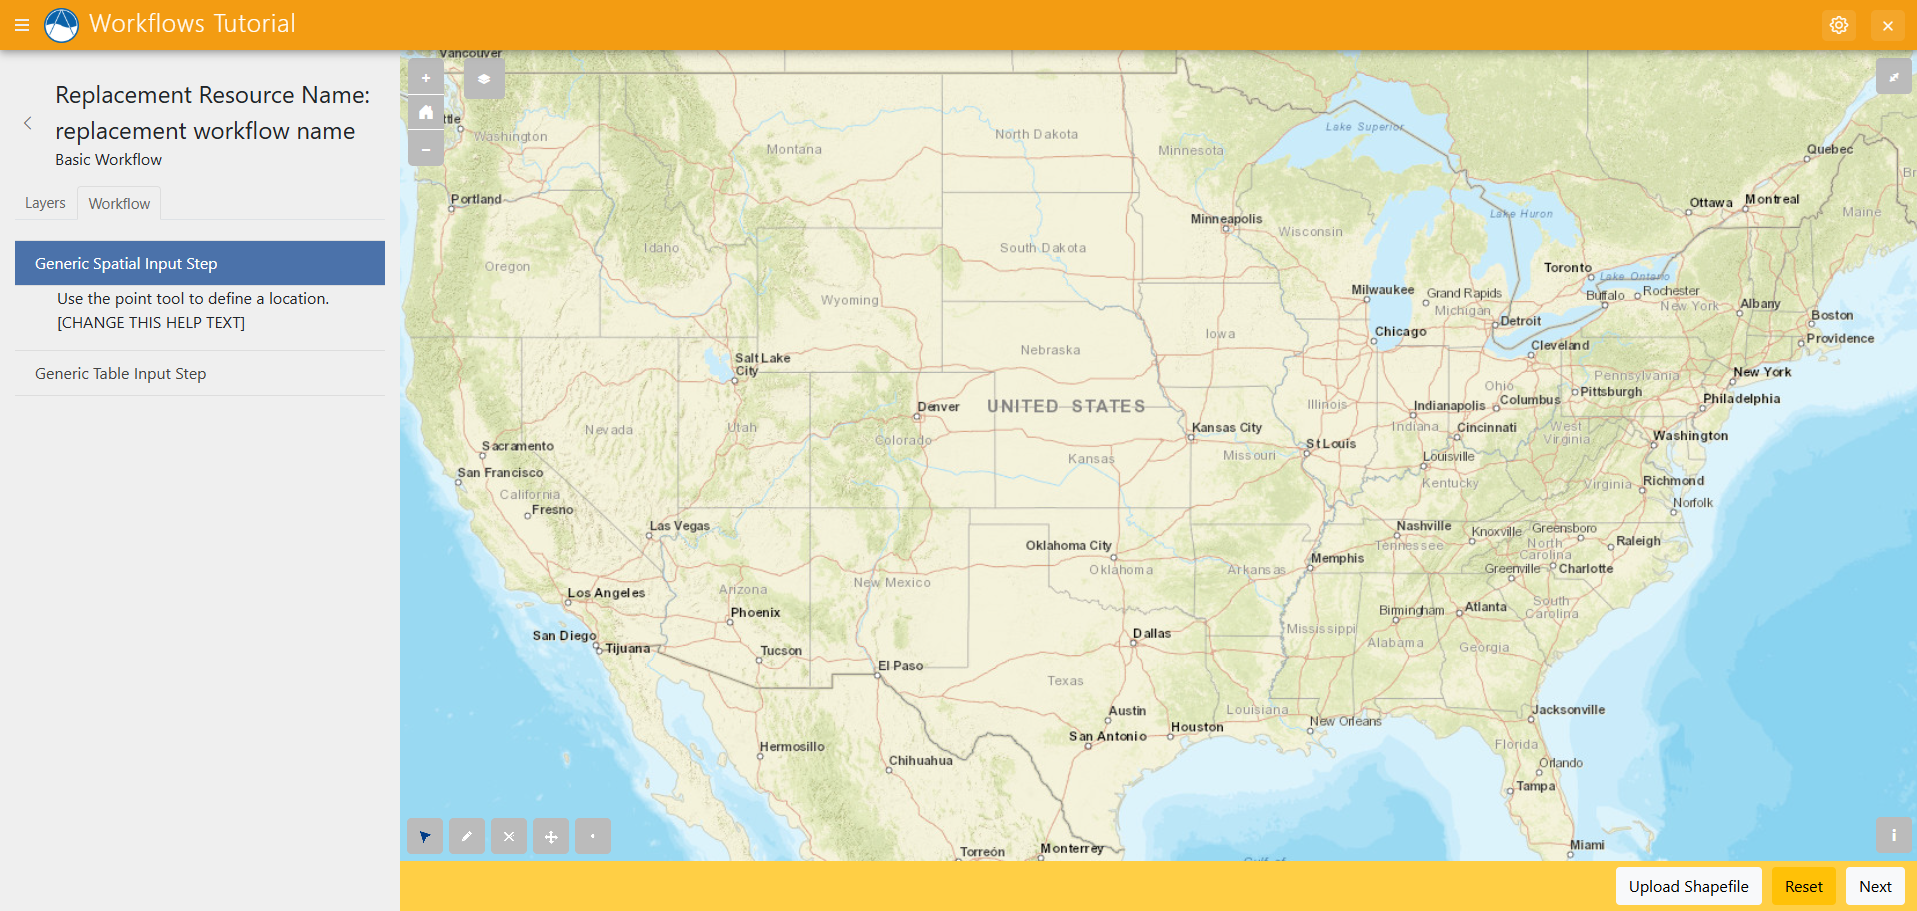
Now, go back to your browser and add a new workflow. You should see "Begin" instead of "none" on the button to the right of your workflow's name. Click "Begin" and you should be taken to this view:
For more information on each of these and steps you can use in workflows, check out the steps documentation: Workflow Steps Documentation
Solution
This concludes the Add Workflow Steps portion of the Tethys Workflows Extension Tutorial. You can view the solution on GitHub at https://github.com/Aquaveo/tethysapp-workflows_tutorial or clone it as follows:
git clone https://github.com/Aquaveo/tethysapp-workflows_tutorial.git
cd tethysapp-workflows_tutorial
git checkout -b add-workflow-step-step add-workflow-step-step-complete