Workflow Steps Documentation
Step Parameters
Steps all take certain parameters:
-
name(str): name of the workflow
-
order(int): place in the workflow order of steps
-
help(str): help text that shows up under the name of the step
-
options(dict): dictionary of options for the step, these options differ for each type of step
Common option available to all steps:
info_text(str): Optional additional text displayed below the step description to provide more context or guidance to the user. When provided, an "Info" button appears beneath the step. Clicking this button opens a popup displaying the guidance text to the user. This text can be raw HTML to include hyperlinks, formatting, etc.
-
geoserver_name(str): name for geoserver access
-
map_manager(MapManager): class for managing any spatial features
-
spatial_manager(SpatialManager): class for interacting with geoserver
Adding a Workflow Step
Adding workflow steps just requires a bit of code inside your workflow class.
Begin by defining what kind of step you're adding and define its parameters and options:
class Workflow(WorkflowBase):
    def new(cls, app, name, creator_id, resource_name, creator_name, geoserver_nam,e map_manager, spatial_manager, **kwargs):
        workflow = cls(name=name, resource_name=resource_name, creator_id=creator_id, creator_name=creator_name)

        spatial_input_step = SpatialInputStep(
            name='Basic Spatial Input Step',
            order=10,
            help="This is a basic spatial input step",
            options={
                'shapes': ['points'],
                'singular_name': 'Test Point',
                'plural_name': 'Test Points',
                'allow_drawing': True,
                'attributes': PointAttributes()
            },
            geoserver_name=geoserver_name,
            map_manager=map_manager,
            spatial_manager=spatial_manager,
        )
Next, add your new workflow step to your workflow:
    workflow.steps.append(spatial_input_step)
    return workflow
Spatial Input Step
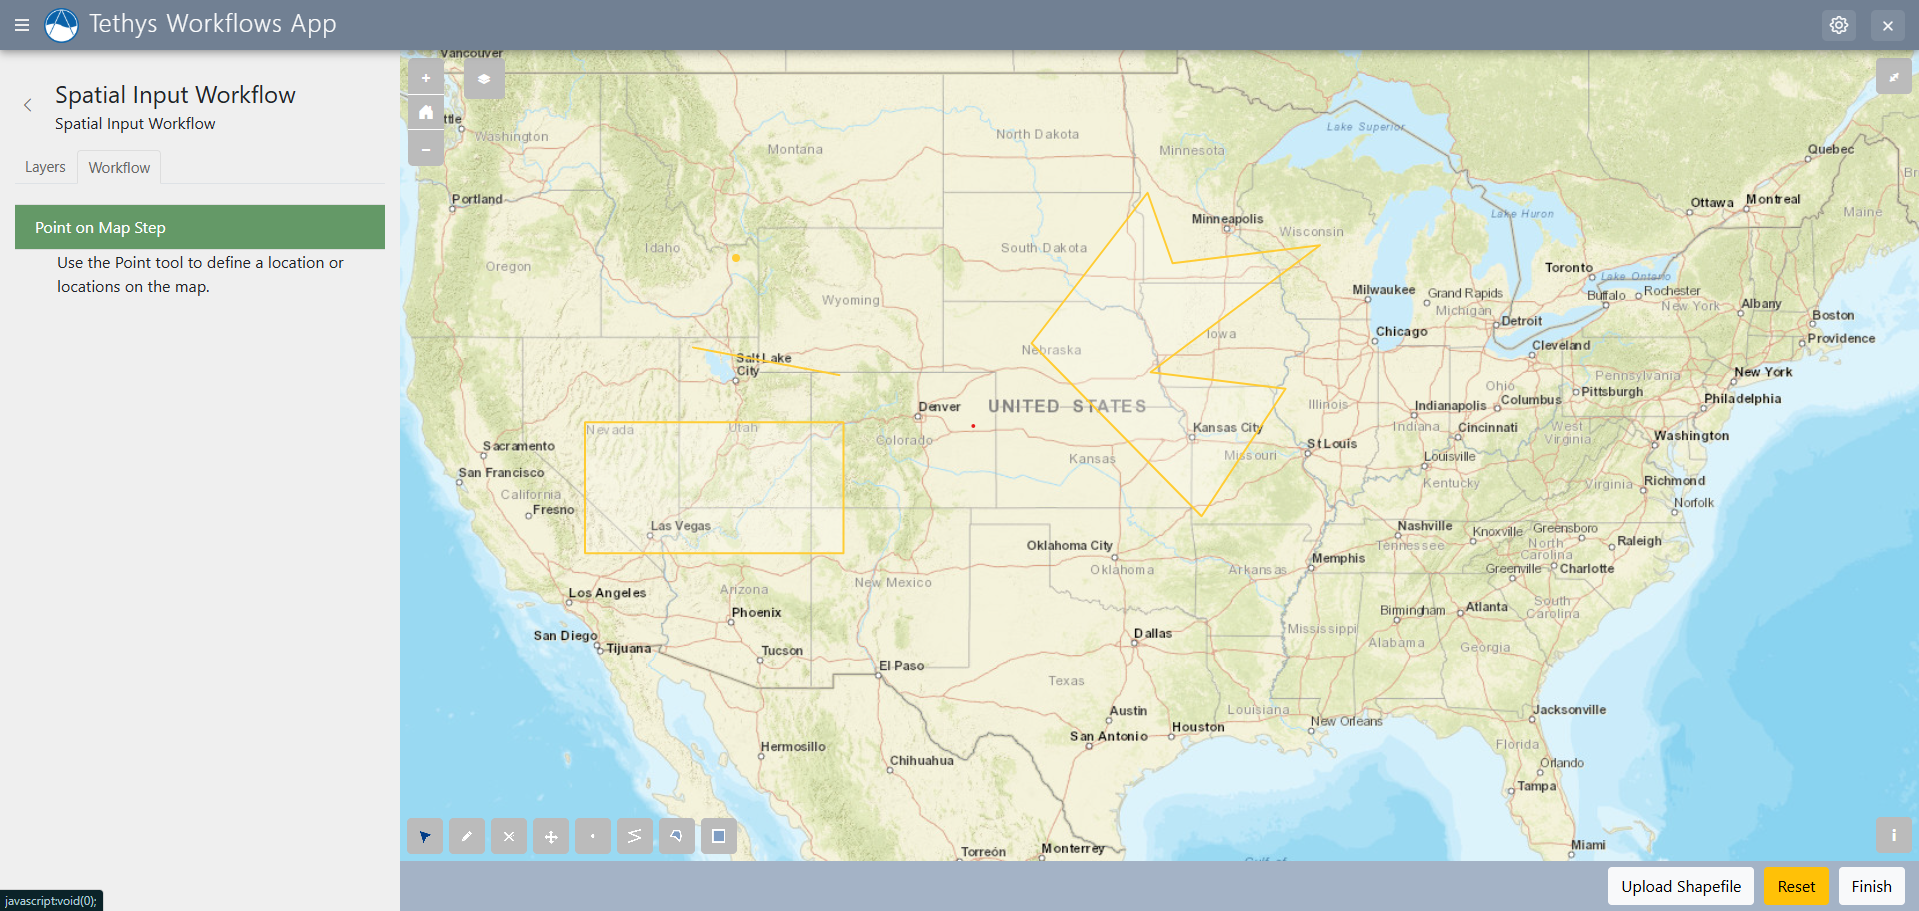 The Spatial Input Step provides an interactive map and multiple options for inputs.
Depending on the shapes option provided, you can add points, lines, polygons, or square/rectangle-shaped extents to the map. Just select an option in the tools in the bottom left corner to get started. In other steps, data can be assigned to features on the map using the Spatial Dataset Step
Options
- shapes(list): The types of shapes to allow. Any combination of 'points', 'lines', 'polygons', and/or 'extents'.
- singular_name(str): Name to use when referring to a single feature in other areas of the user interface (e.g. "Detention Basin").
- plural_name(str): Name to use when referring to multiple features in other areas of the user interface (e.g. "Detention Basins").
- allow_shapefile(bool): Allow shapfile upload as spatial input. Defaults to True.
- allow_drawing(bool): Allow manually drawing shapes. Defaults to True.
- snapping_enabled(bool): Enabled snapping when drawing features. Defaults to True.
- snapping_layer(dict): Specify a layer to snap to. Create a 1-dict where the key is the dot-path to the layer attribute to use in comparison and the value is the value to match (e.g.
{'data.layer_id': 10}). - snapping_options(dict): Supported options include edge, vertex, pixelTolerance. See: https://openlayers.org/en/latest/apidoc/module-ol_interaction_Snap.html
- allow_image(bool): Allow reference image upload as spatial input. Defaults to False.
- attributes(param.Parameterized): Class defining the attributes for the features added to the map (See example below)
Spatial Dataset Step
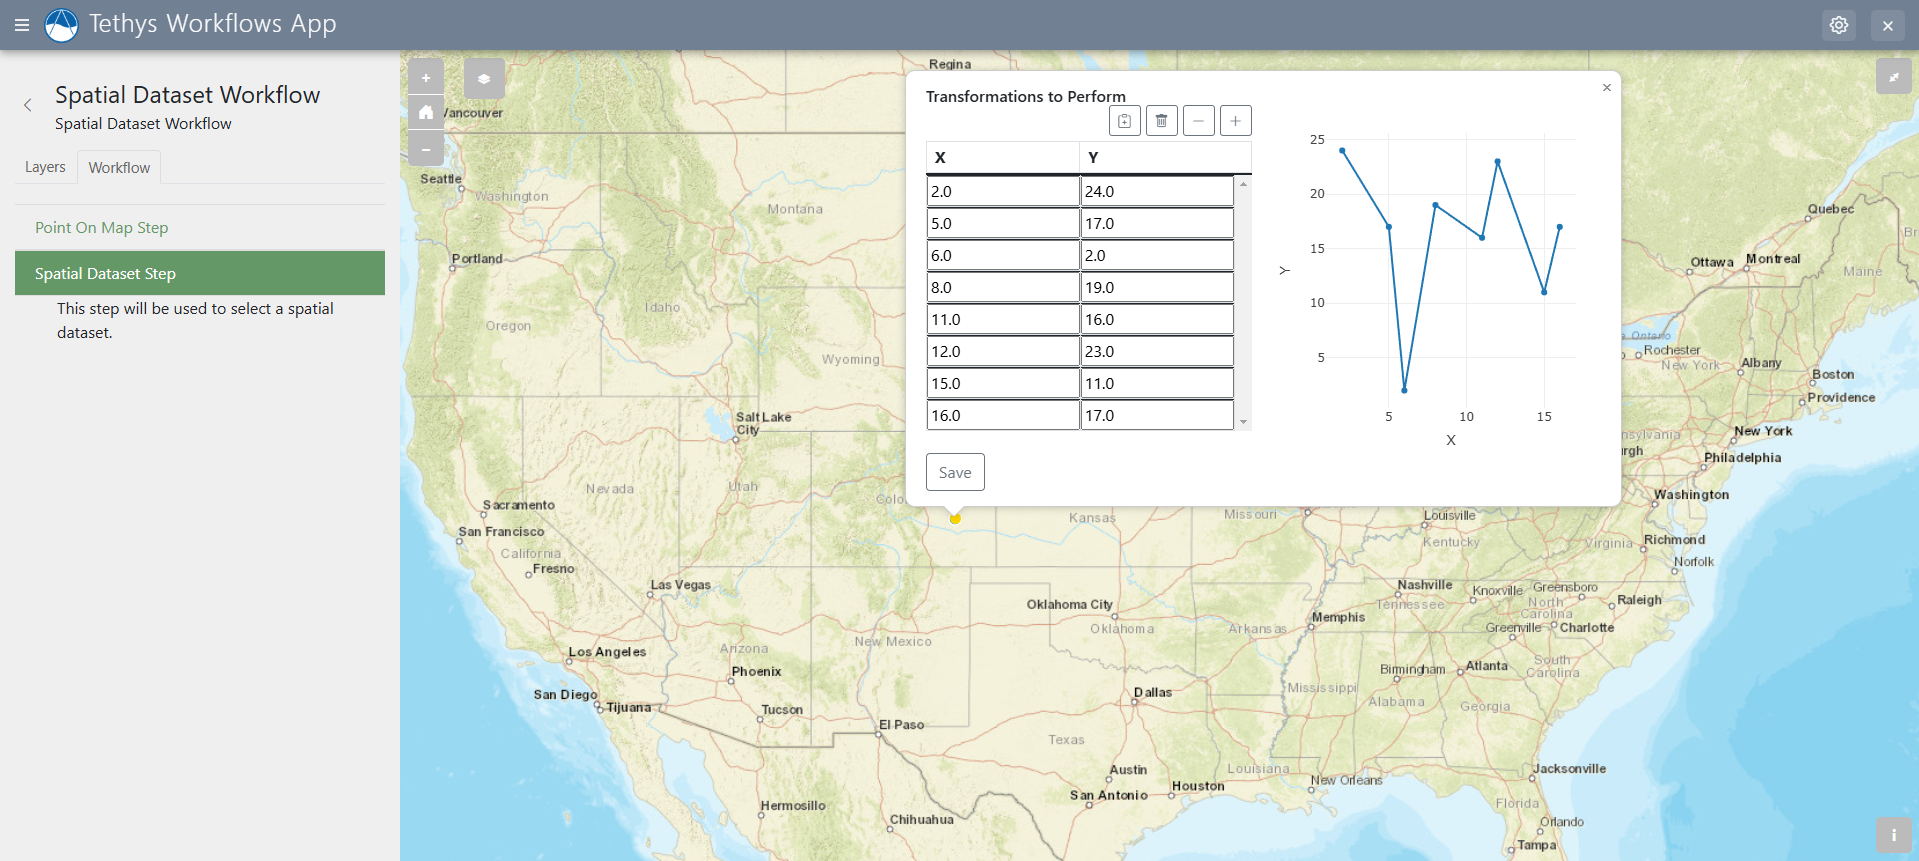 The Spatial Dataset Step builds on the Spatial Input step where features that were placed on the map can be assigned datasets(tables full of data)
Options:
- geometry_source(varies): Geometry or parent to retrieve the geometry from. For passing geometry, use GeoJSON string.
- dataset_title(str): Title of the dataset (e.g.: Hydrograph). Defaults to 'Dataset'.
- template_dataset(pd.DataFrame): A Pandas dataset to use as a template for the dataset. Default is pd.DataFrame(columns=['X', 'Y'])
- read_only_columns(tuple,list): Names of columns of the template dataset that are read only. All columns are editable by default.
- plot_columns(Union[2-tuple, list of 2-tuple]): Two columns to plot. First column given will be plotted on the x axis, the second on the y axis. No plot if - not given. Multiple series plotted if a list of 2-tuple given, ex: [(x1, y1), (x2, y2)].
- max_rows(integer): Maximum number of rows allowed in the dataset. No maximum if not given.
- empty_rows(integer): The number of empty rows to generate if an no/empty template dataset is given.
Form Input Step
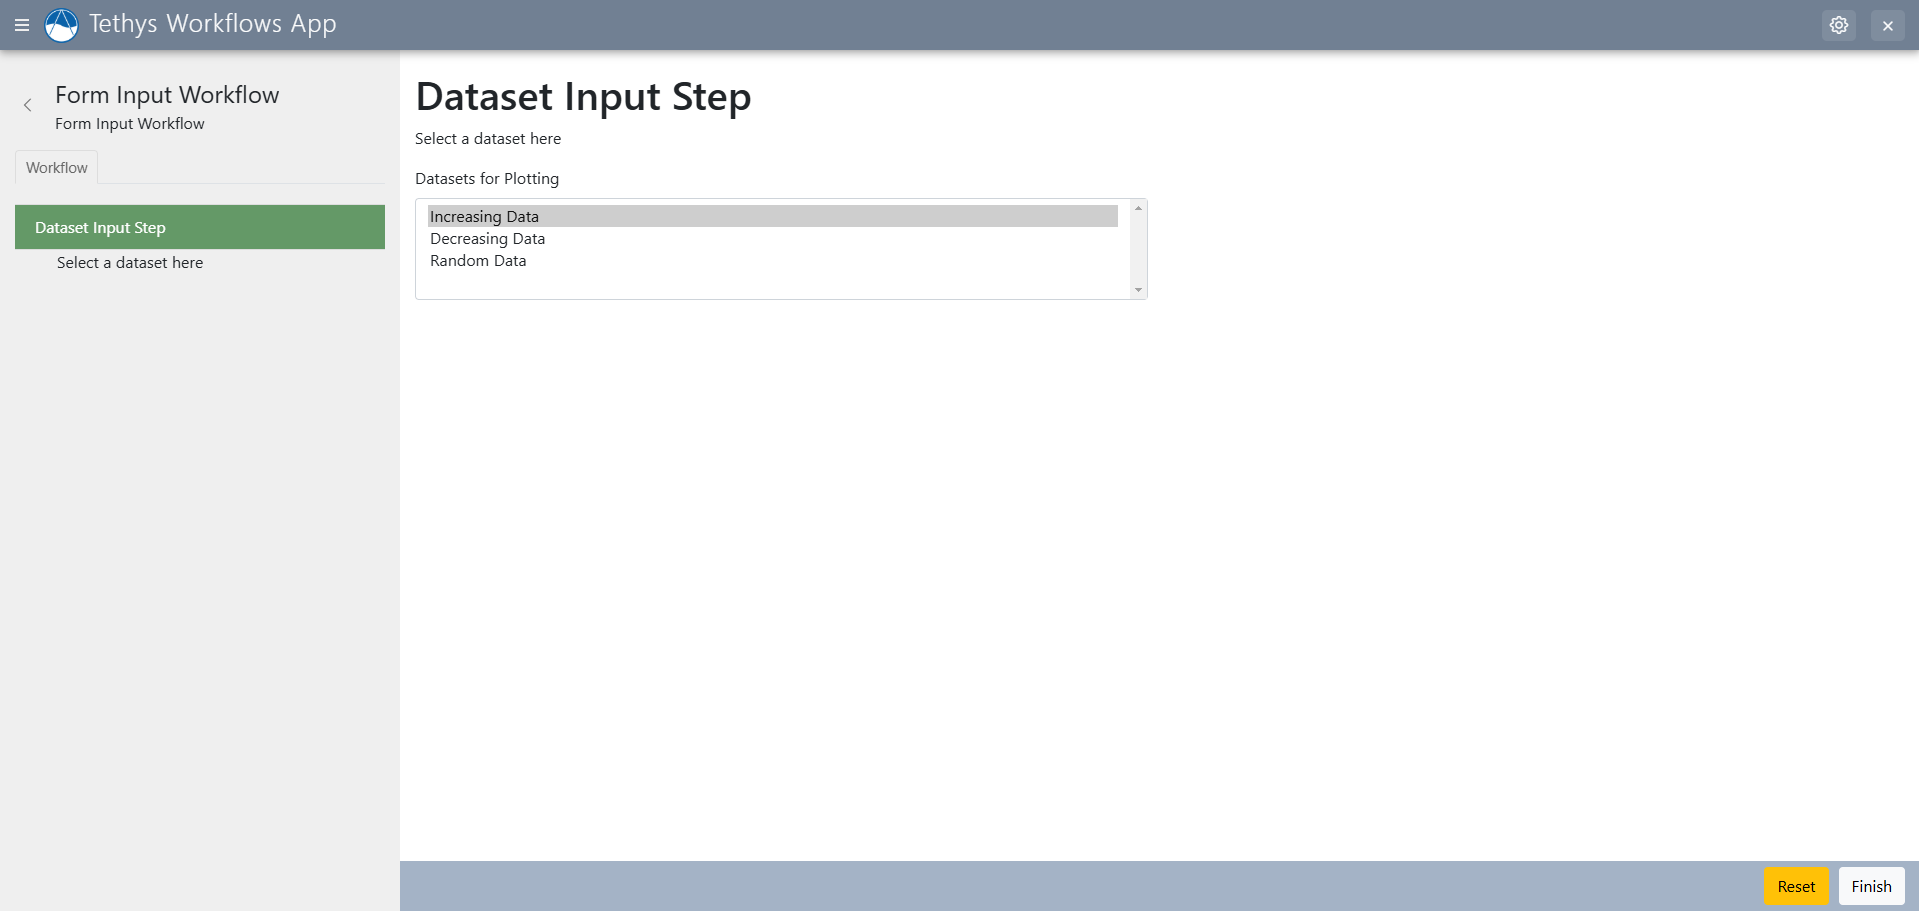 The Form Input Step allows you to select between various different options in a drop down menu.
Options:
- form_title(str): Title to be displayed at the top of the form. Defaults to the name of the step.
- status_label(str): Custom label for the status select form field. Defaults to "Status".
- param_class(dict): A param class to represent form fields.
- renderer(str): Renderer option. Available values are 'django' and 'bokeh'. Defauls to 'django'
Set Status Step
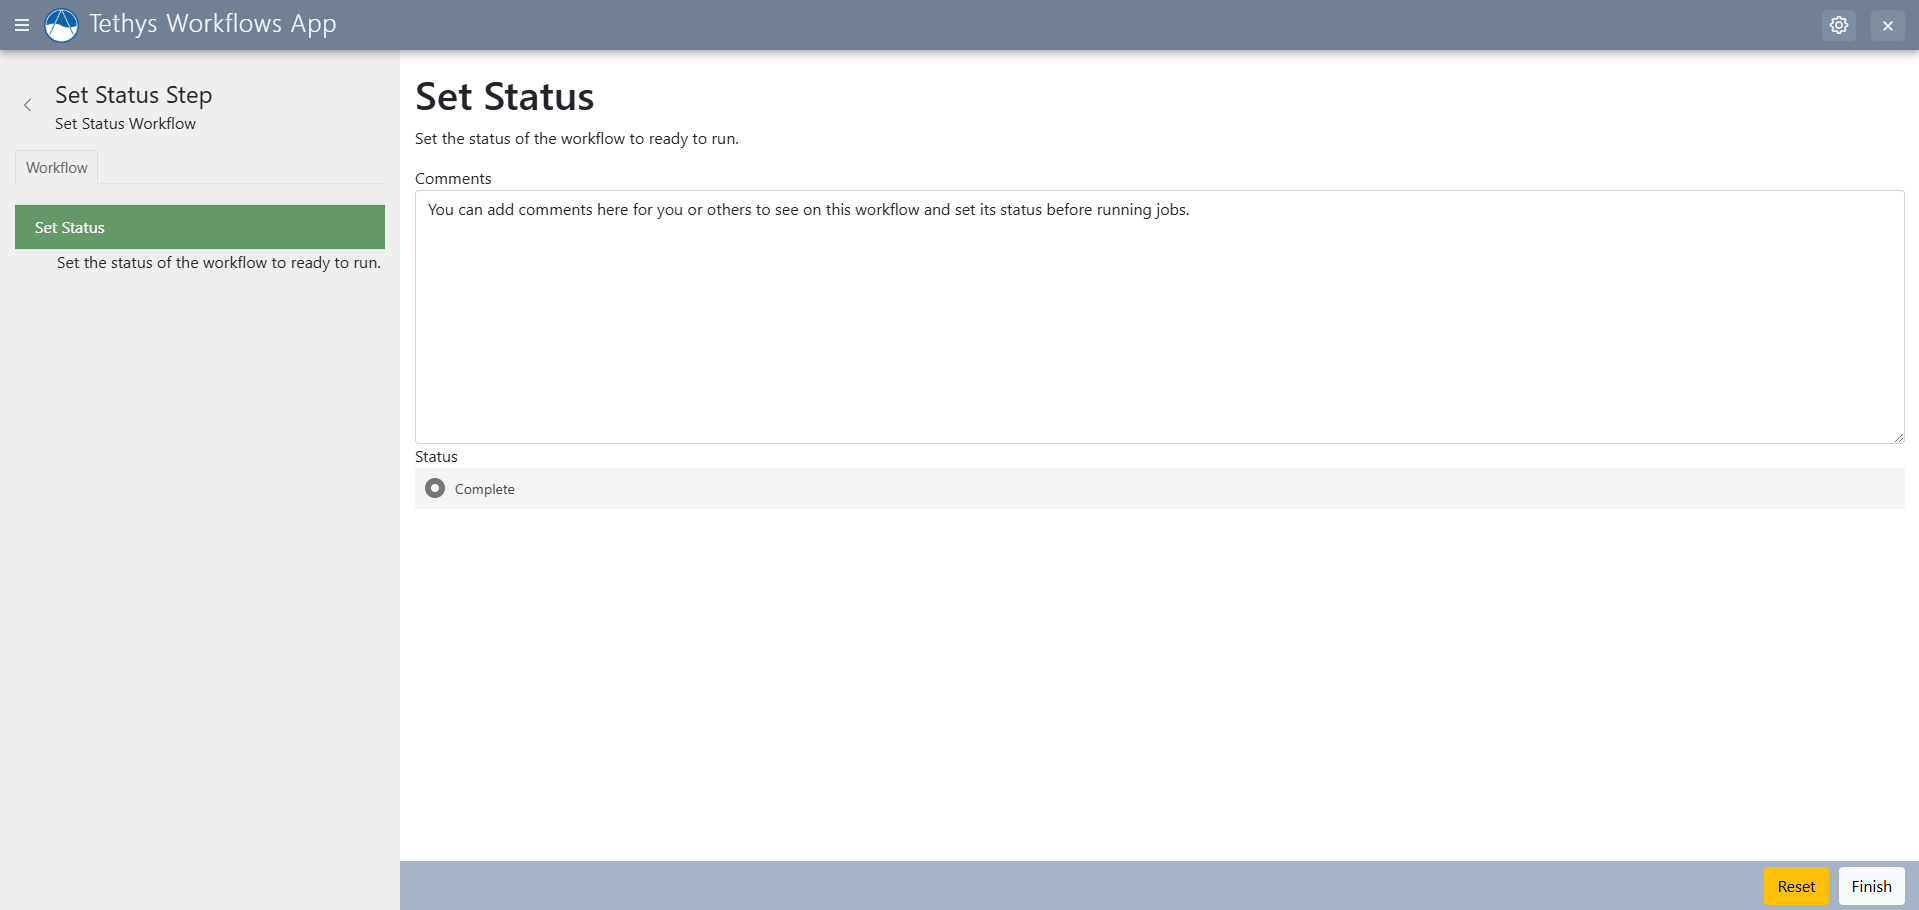 Set status allows you to set the workflow's status as ready or not, along with adding notes for the workflow itself.
Options:
- form_title(str): Title to be displayed at the top of the form. Defaults to the name of the step.
- status_label(str): Custom label for the status select form field. Defaults to "Status".
- statuses(list(dicts(status,label))): List of dictionaries with two keys: "status" and "label". The value of "status" must be a valid status from the StatusMixin as determined by the valid_statuses() method on the step. The value of the "label" will be what is displayed to the user. If "label" is None or not given, the value of "status" will be displayed to the user.
Table Input Step
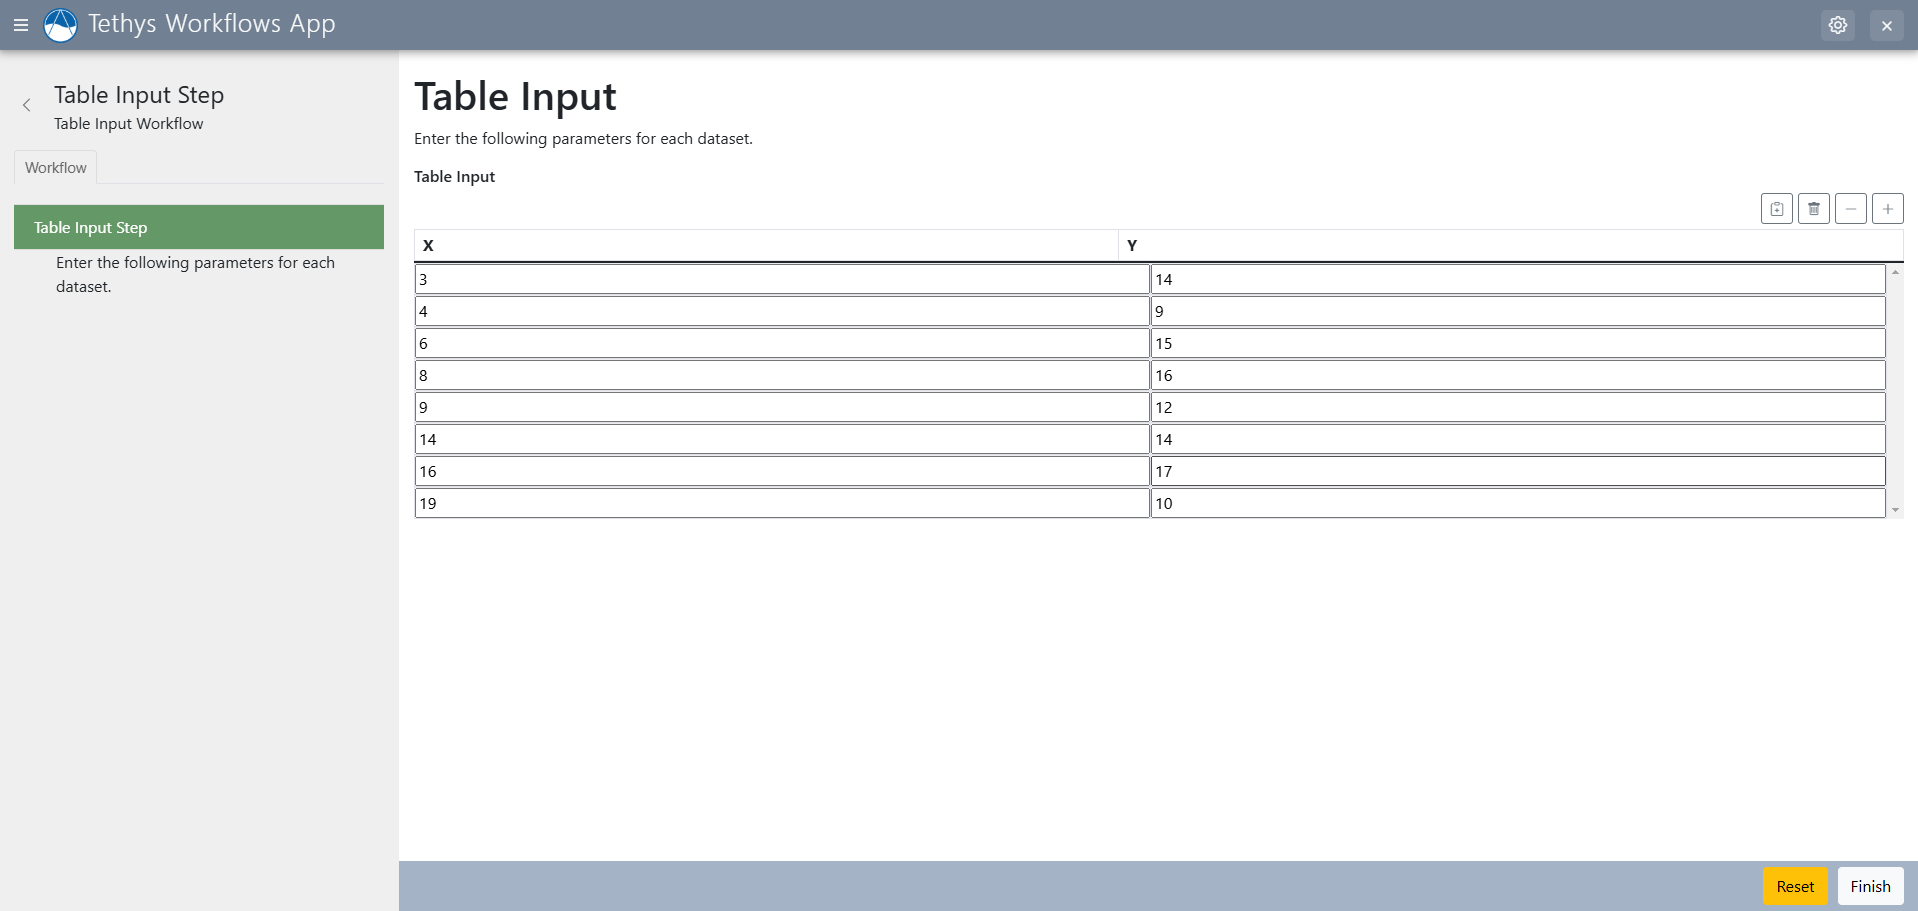 The table input step adds a table input with two columns and any amount of rows. You can specify the column header names.
Options:
- dataset_title(str): Title of the dataset (e.g.: Hydrograph). Defaults to 'Dataset'.
- template_dataset(pd.DataFrame): A Pandas dataset to use as a template for the dataset. Default is pd.DataFrame(columns=['X', 'Y'])
- read_only_columns(tuple,list): Names of columns of the template dataset that are read only. All columns are editable by default.
- plot_columns(Union[2-tuple, list of 2-tuple]): Two columns to plot. First column given will be plotted on the x axis, the second on the y axis. No plot if not given. Multiple series plotted if a list of 2-tuple given, ex: [(x1, y1), (x2, y2)].
- max_rows(integer): Maximum number of rows allowed in the dataset. No maximum if not given.
- empty_rows(integer): The number of empty rows to generate if an no/empty template dataset is given.
Job Step

The Job Step allows you to run condor jobs.
Options:
- scheduler(str): Name of the Condor scheduler to use.
- jobs(list(dict)): A list of dictionaries, each containing the kwargs for a CondorWorkflowJobNode.
- workflow_kwargs(dict): Additional keyword arguments to pass to the CondorWorkflow.
Job steps can also be assigned a result step to view results.
Results Step
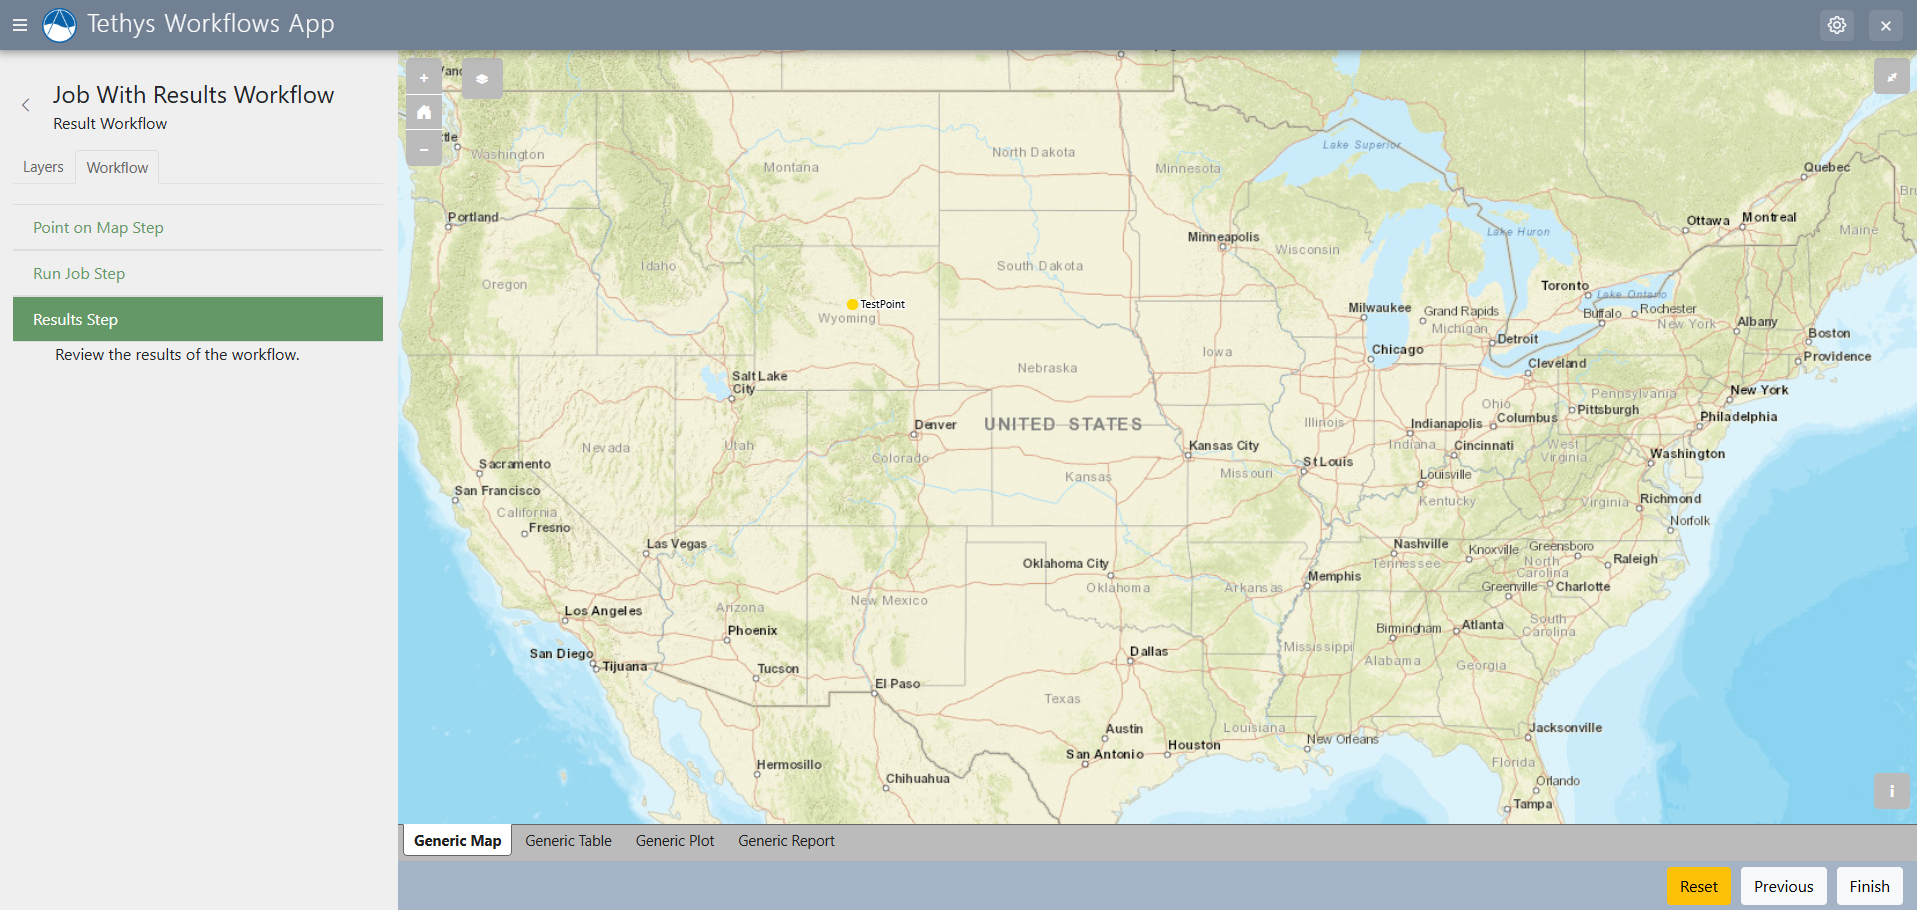
The results step allows for analysis of the results of your condor jobs and review information provided in previous steps.
Result steps are assigned to earlier job steps as such:
job_step = JobStep(
    ...
)

result_step = ResultsStep(
    ...
)

job_step.result = result_step
Result tabs can then be assigned as such:
def build_results_tabs(geoserver_name, map_manager, spatial_manager):
    # Build result tabs here and return in a list.
    ...
result_step.results.extend(build_results_tabs(gesoerver_name, map_manager, spatial_manager))